How to connect GNSS RTK Receiver and AgOpenGPS for precision farming
Contents

In this tutorial we explain how to use RTK Receiver with AgOpenGPS. AgOpenGPS (AOG) is an open-source GPS guidance software that can be used as a basic lightbar, right through to RTK autosteer with section control.
If you just want to start with a basic set up, where the “light bar” on the screen is used for guidance, this tutorial is for you. In this tutorial we show step by step how to connect GNSS/RTK receiver and antenna in order to get an accurate location data.
In order to have centimeter level accuracy in AgOpenGPS, you will need RTK corrections. In this tutorial we explain you 3 options of getting correction data with different set of products:
We’ll use CatNet GNSS service which is free and have coverage in the area where the tests are taking place.
You need to find a NTRIP service provider that covers your geographic location.If you aren’t aware of them, we have prepared a list for you. Most of these services are free, but require registration.
If you don’t have a base station close to your location, you may install your base station and share it with prefered NTRIP Caster like a free RTK2go. Learn how to share your base station with RTK2go.
Required hardware:
- simpleRTK2B – Basic Starter Kit
- USB to micro-USB cable
- a tablet or a PC with Windows
This option is only available for users in Europe/USA/Australia/South Korea. We include Internet unlimited corrections for FREE until the end of the year, no subscription required! If after that you decide to continue using the service, you can subscribe with Internet plans and keep on enjoing RTK corrections.
Required hardware:
- simpleSSR – Starter Kit incl. 1 year unlimited RTK corrections
- USB to micro-USB cable
- a tablet or a PC with Windows
This option is only available for users in Europe/USA/Australia/South Korea. We include Internet unlimited corrections for FREE until the end of the year, no subscription required! If after that you decide to continue using the service, you can subscribe with Internet plans and keep on enjoing RTK corrections.
Required hardware:
- simpleRTK2B – Basic Starter Kit
- Ethernet NTRIP Master
- 2x USB to micro-USB cable
- a tablet or a PC with Windows
- 4G LTE Modem Router or any other device with access to internet
- Ethernet cable
How to use ArduSimple RTK receiver with AgOpenGPS?
Firstly, configure GNSS RTK receiver.
- Connect GNSS RTK receiver to your PC via the USB connector labeled POWER+GPS.
- Open u-center and connect your receiver. If you do not know how to do it, we have a tutorial how to connect to your GPS receiver and check communication.
- Upgrade your firmware of the receiver to the latest version by following the tutorial.
- Download a configuration file (press right mouse button and choose Save link as…).
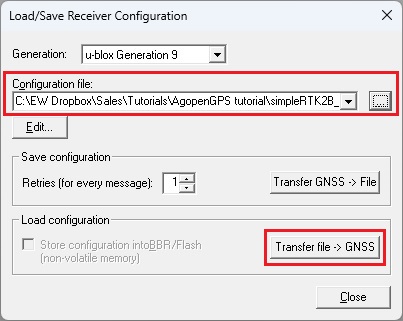
- Open Tools -> Receiver Configuration, pick your file and click Transfer File -> GNSS button.
- Once the configuration is done, go to Receiver -> Action -> Save Config to save the configuration of the RTK receiver.
- Close u-center.
- Place RTK antenna on your agricultural machine in a location with good view of the sky or near a window for testing the functionality.
- Connect the RTK antenna to your receiver.
Secondly, connect your receiver to AgOpenGPS.
- Open AgOpenGPS.
- If you do not have your antenna installed in your machine and you are just testing, you can go directly to the step #14.
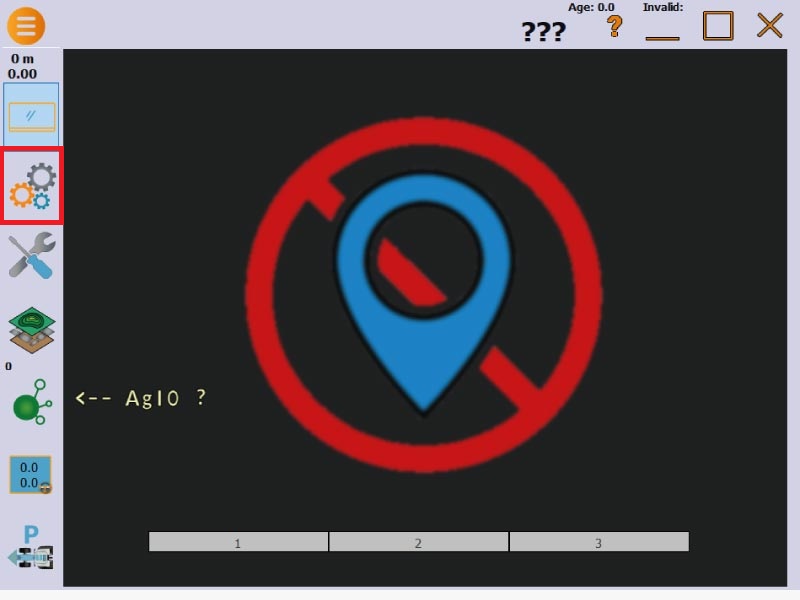
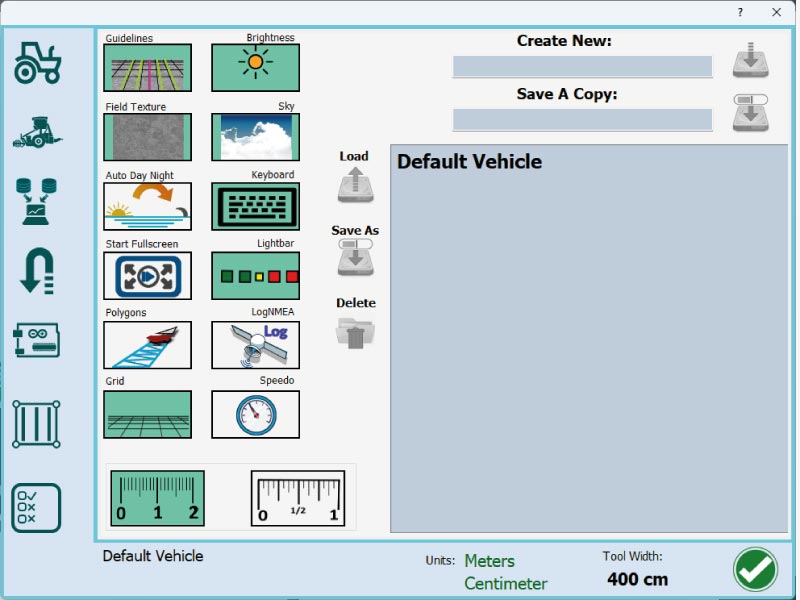
If you have your antenna installed on your tractor, click on gears icon. - Setup the parameters of your machine, the position of antenna etc in the Settings.
- Setup the parameters of your farming machine, the position of antenna in AgOpenGPS.
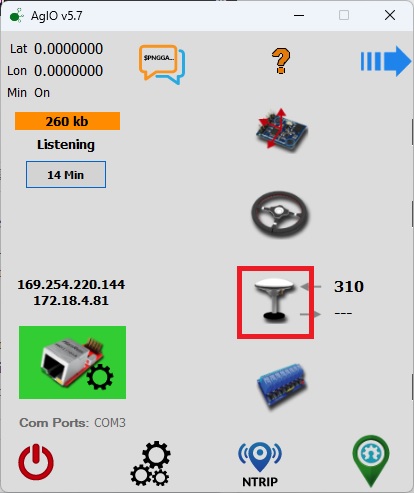
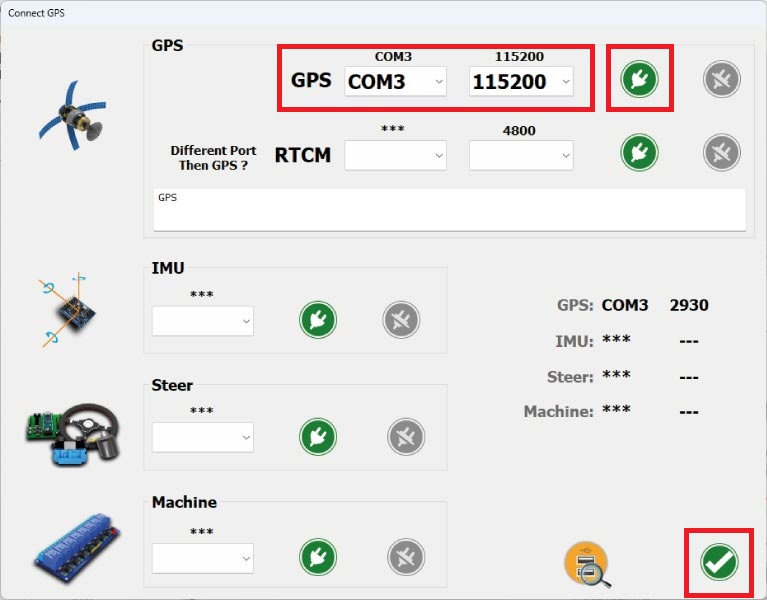
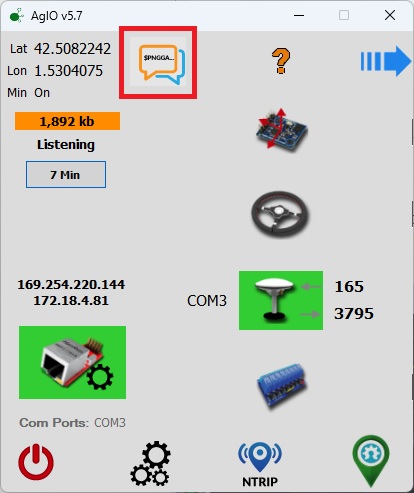
- In AgIO window press Antenna icon.
- Choose COM port and the appropriate Baud rate of your GPS receiver.
Note: Make sure that your receiver is disconnected from u-center because u-center and AgIO do not run at the same time. - Press Confirm and OK to close the dialog window.
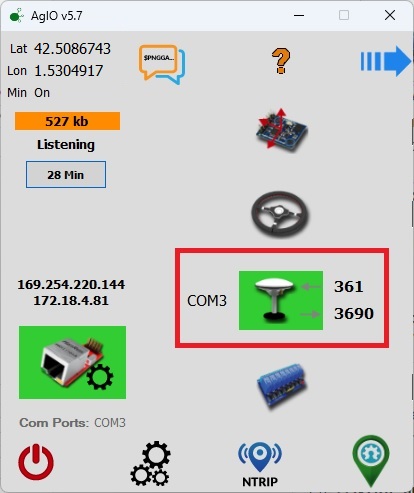
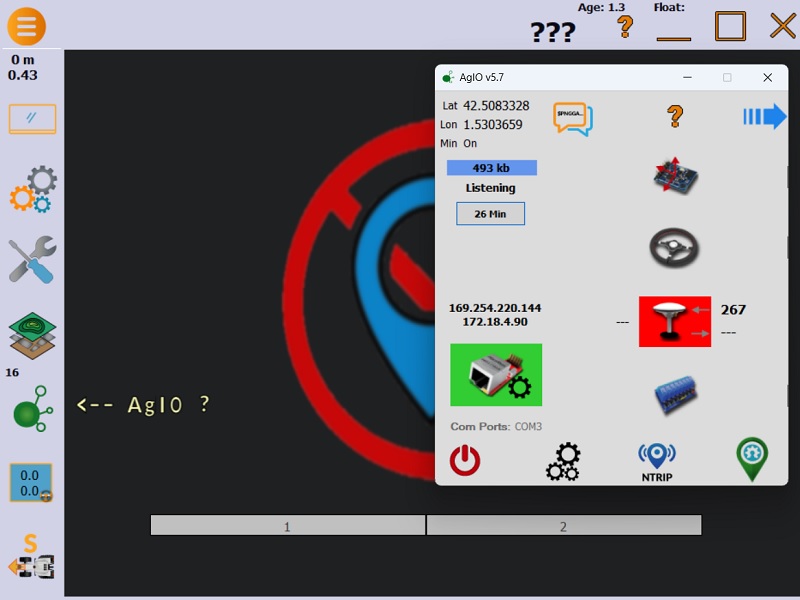
- When the Antenna icon is green, it is communicating normally. If neither green or red, it has not been connected this session. If it is red, it was formerly talking, but has lost communication.
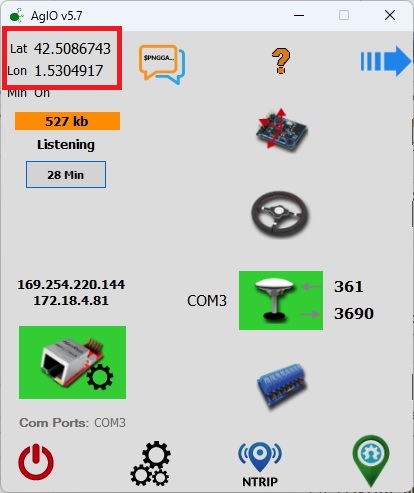
- It may take a few minutes to see the latitude and longitude in AgIO.
Thirdly, achieve centimeter level accuracy.
- In order to achieve accurate location data in AgOpenGPS, your receiver needs to receive RTK corrections:
- Make sure you have credentials to connect to NTRIP service (username, password and the parameters of the connection). If you do not, register on a NTRIP server and get the username, password and the parameters of the connection.
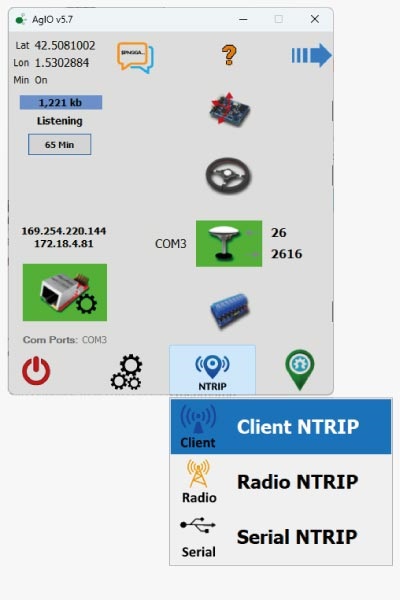
- Press NTRIP and choose NTRIP Client.
- Enter username and password, Broadcaster url or IP.
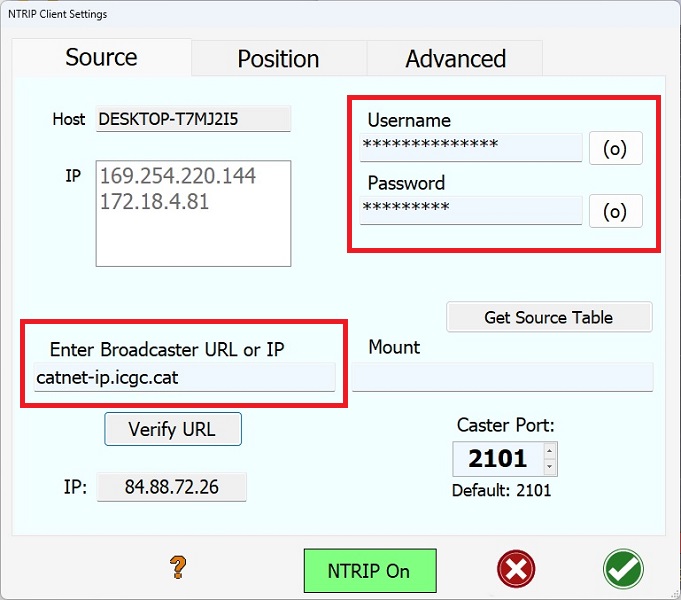
- Press Get source table.
In the window you will see details of the different stations that belong to your NTRIP service provider. Some of them broadcast generic information while others send you corrections.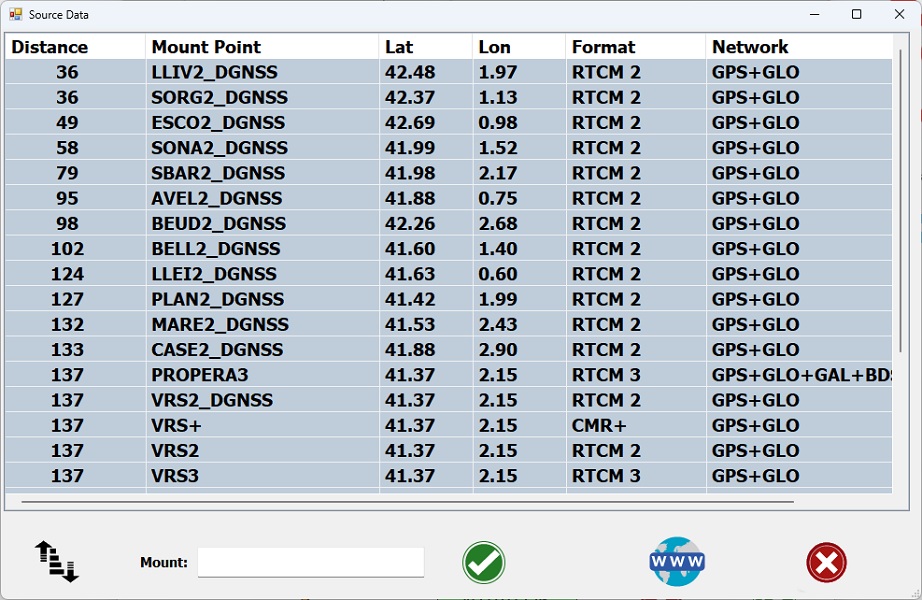
- Choose the mountpoint that you want to use and click OK.
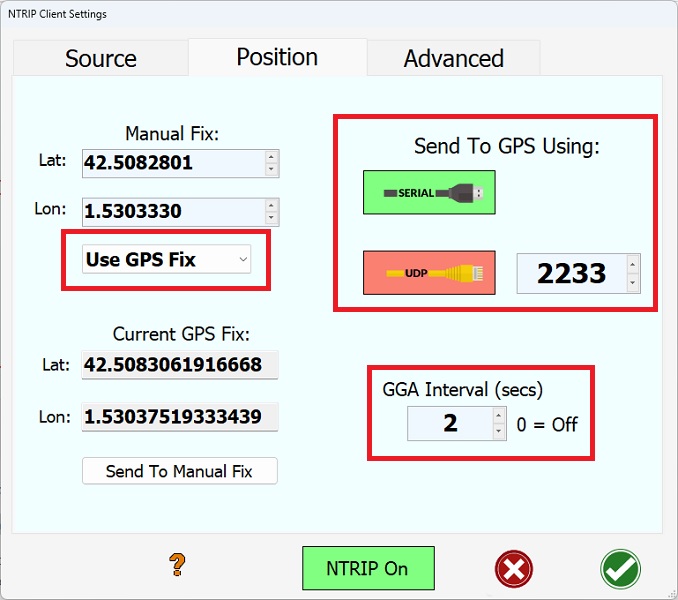
- Open Position Tab.
- Use the current GPS Fix to fill in the Manual Fix entry. Saves a lot of typing.
- Select serial or UDP and the port to send to. If using one but not the other, turn off the one you are not using. (most often is the case).
- Set GGA Interval (how often a GGA sentence gets sent back to the caster). More often uses more data. And set to 0 if you want it off completely to not send at all.
- Click OK.
- Follow the tutorial How to use PointPerfect with u-blox receivers.
- Follow the tutorial How to use PointPerfect with u-blox receivers.
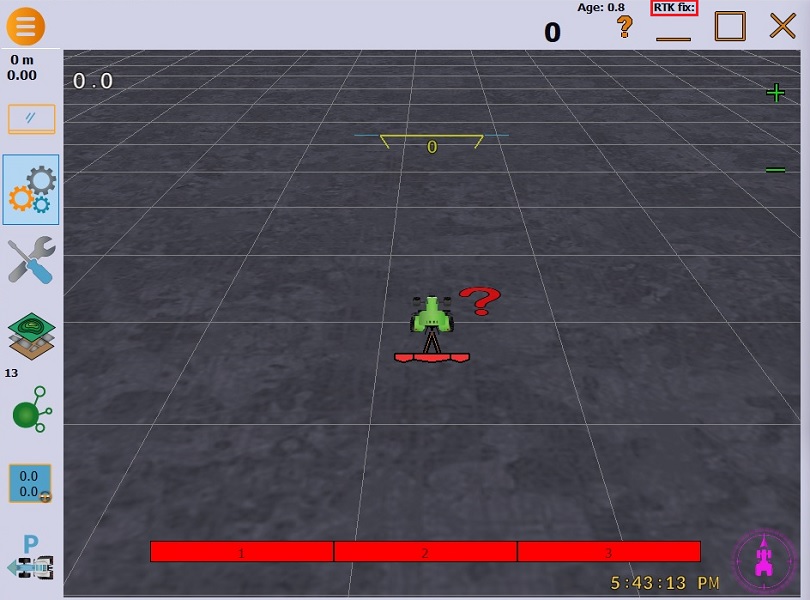
- Now you are all set up and getting correction data. Wait a couple of minutes to get corrections. In the main window you will see RTK fix status.
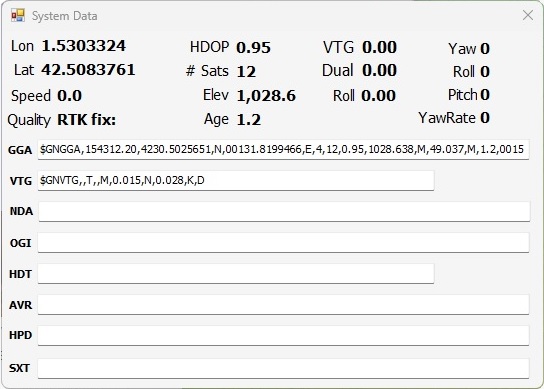
- Press the Messages icon in AgIO to open a window showing all the NMEA information.
- You will see the position data, quality and other system data.
- Now you are good to start your field work with centimeter level accuracy. Guide your farming vehicle with a light bar and precision position.
If you're new to AgOpenGPS, we explain how to create your field and navigate your farming vehicle using a light bar:
- Since we are performing this tutorial in the office, we will use Simulator mode to perform tests. Firstly, press Field -> Field-> Close, secondly, disconect antenna in AgIO. You will see the software similar to this.
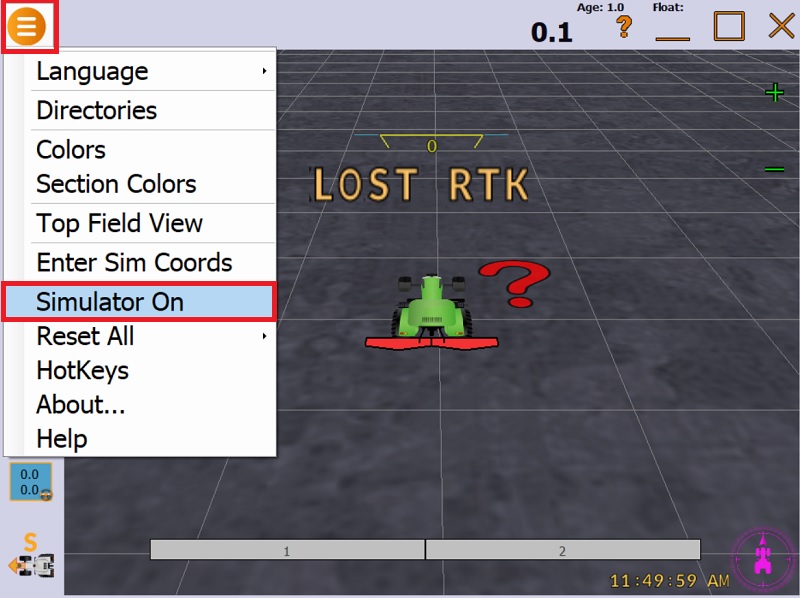
- Press main menu button and click Simulator On. Do not worry that we do not have RTK now because it is simulator mode.
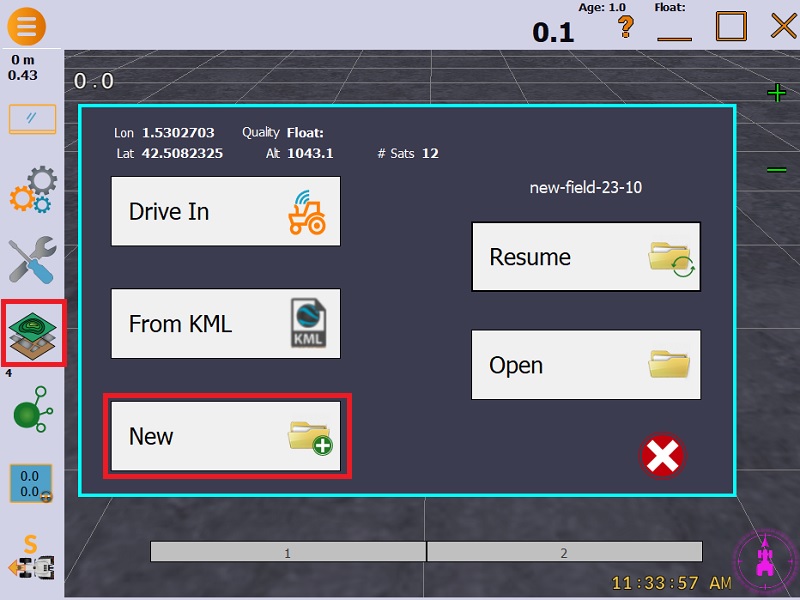
- Press Field icon and choose New.
- Enter the name of the field and press OK.
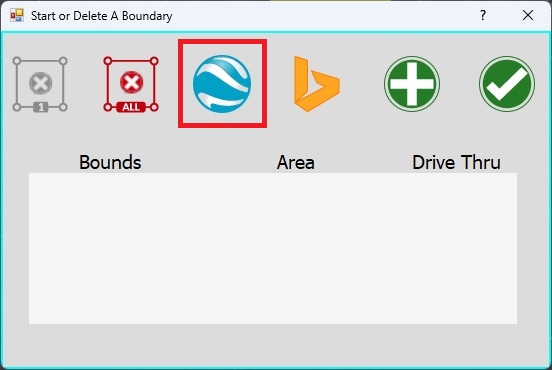
- Press Field icon, choose Boundary and then choose Google Earth option.
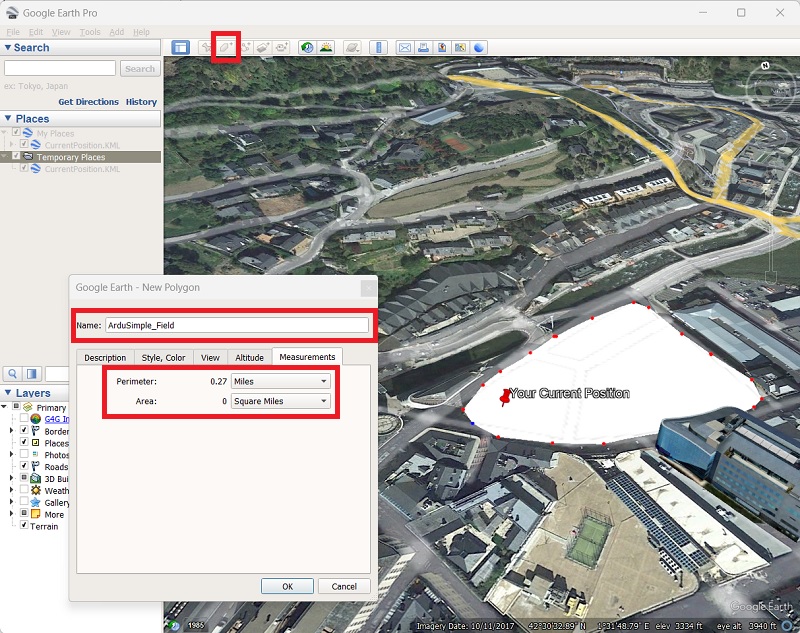
- Find your field on the map, choose Polygon Toll and mark your field on the map. Enter a name of the field. Here you can check the square and perimeter of you field on Measurement tab. Press OK.
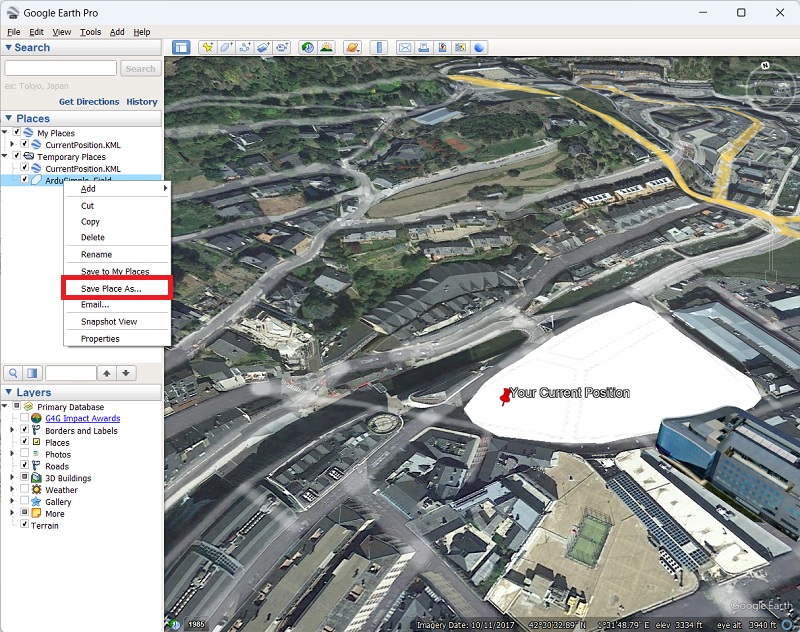
- Click right button on the name of the field and Save my Place as.
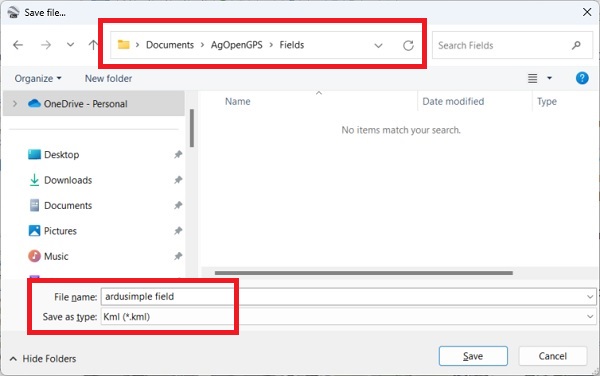
- Choose *.kml as a type of the file and save it in the AgopenGPS->Fields folder.
- Close Google Earth Pro.
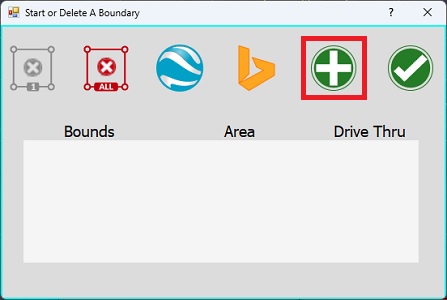
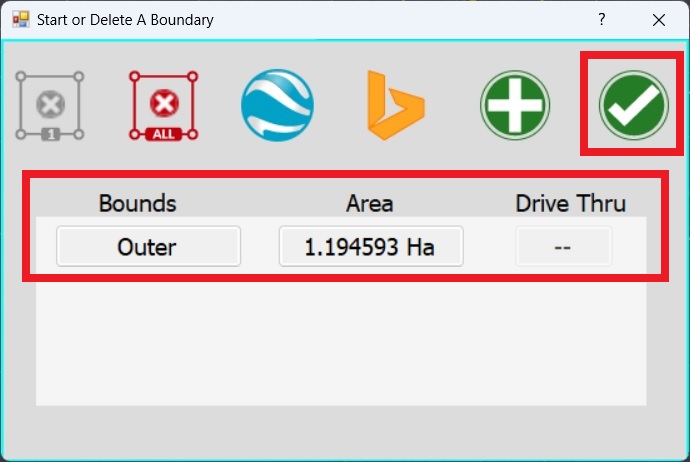
- Open AgopenGPS, press Fields->Boundary and press “+” button.
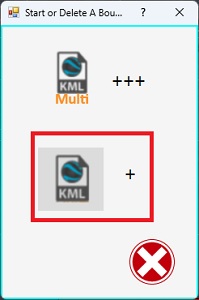
- Press KML and then KML format like it is shown on the picture (not a KML+++ format).
- Find in the brouser the file you created and than press Open.
- Press OK in AgOpenGPS window.
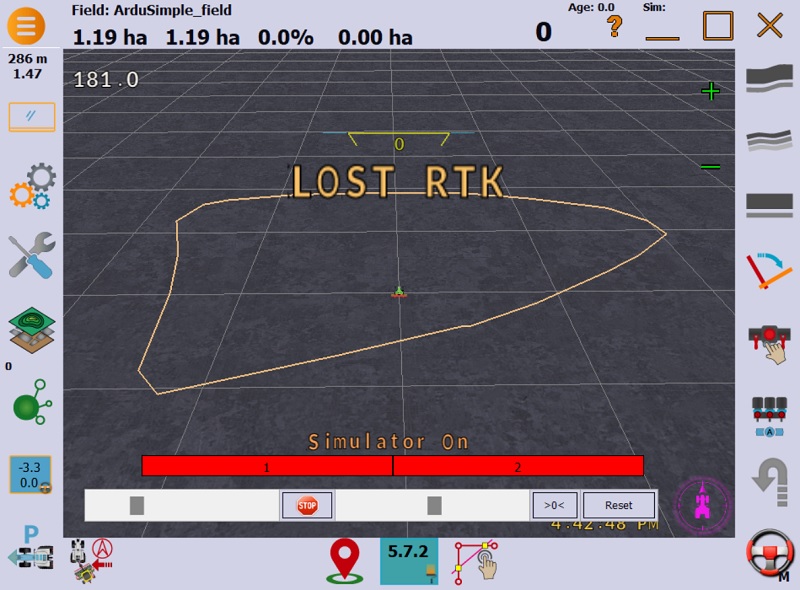
- Now you can see your field.
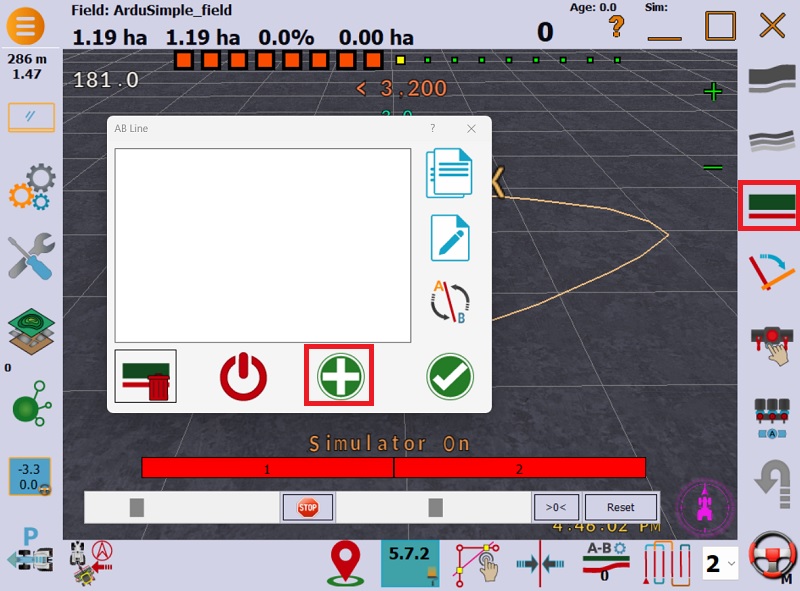
- Press AB line or the right side and press “+“.
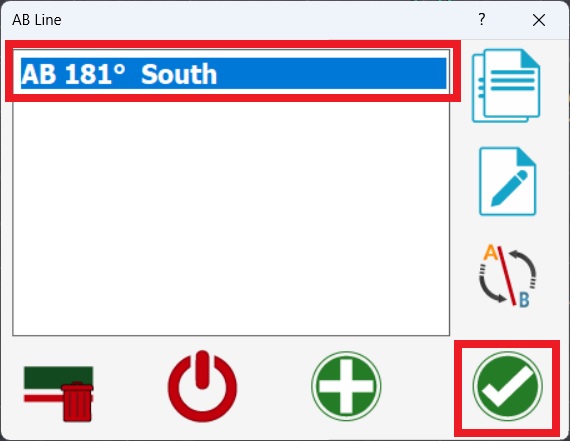
- Set A and B position of your line and press OK. Choose an AB line that you have just created and press OK.
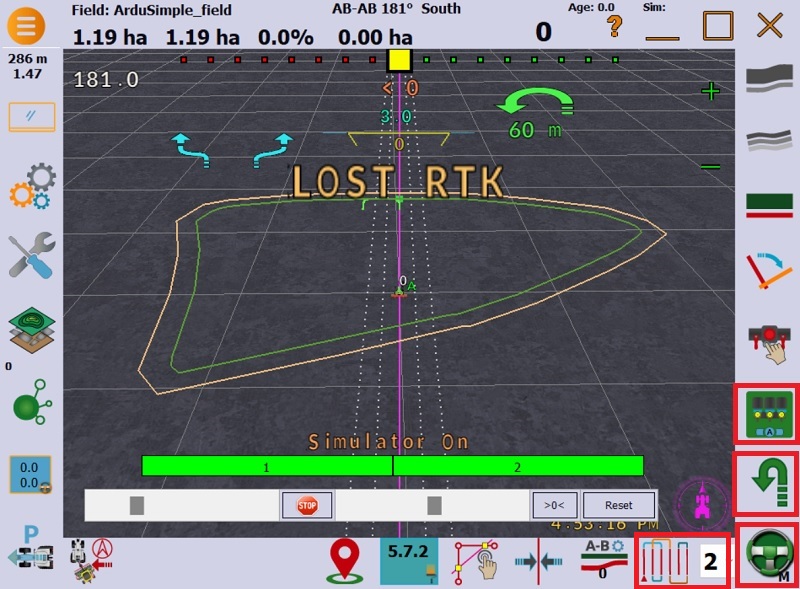
- Turn on Auto Steer, Auto Section, You Turn.
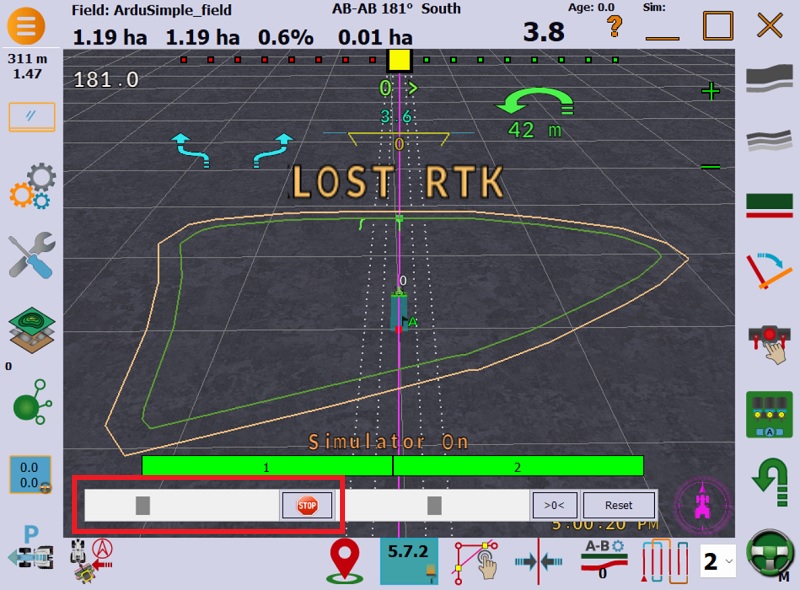
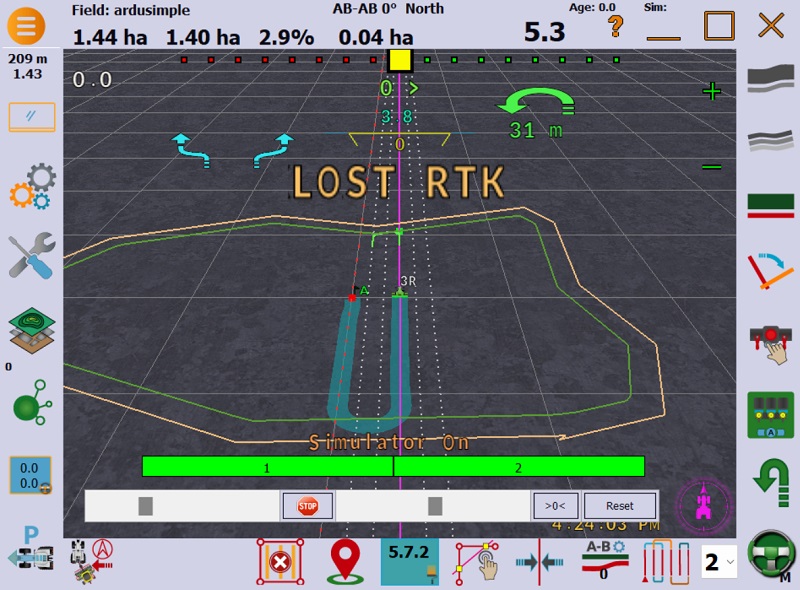
- With this setup, you’re prepared to navigate your tractor using the light bar. As soon as your farming machinery starts moving, you will see the light bar. Start to move your vehicle using slider or your keybord.
- When your vehicle achieves countour, it will automatically turn.
 and
and 
